If you have a saltwater, reef, or planted aquarium, installing a canister filter will be your first priority. Canister filters are powerful and use highly pressurized water to filter aquarium water to make it crystal clear and hygienic for fishes.
Since the canister filter allows you to customize the filter media, it comes with virtually limitless aquarium water maintenance options. However, a canister filter isn’t a Houdini magic that will unwrap itself from the package and get installed at the aquarium wall all on its own.
Therefore, you have to know how to set up a canister filter. And don’t take the canister filter installation for granted. It is a tricky job since you have to understand the accessories first, gather them properly, and start the set up process.
Also, you must know how to select the right filtering media for it. Thus, the entire set up for the canister filter is both time-consuming and challenging.
But don’t worry.
The following instructions on the canister filter set up should make it easy for you, even if you are a novice aquarium owner.
Understanding and Gathering Canister Filter Components
Can you imagine a device without any assembled parts? Well, that is as realistic as a machine running without any fuel; a utopian idea. So, we don’t go with the unrealistic notion.
A canister filter is a complicated combination of different components. These components or parts work together to make the canister filter efficient and useful.
Water hoses:
Hose or tube works as the bridge between the filter and the aquarium. It connects with the filtering chamber and is submerged in the tank water. Thus, the hose functions as an inlet tube to allow the water to travel to the filter chamber through it.
When the water is filtered, a secondary hose transfers the clean water to the aquarium.
Valves and knots:
You can use the valve to control the water flow. Thus, it enables you to regulate the water flow and filter it effectively. The knots on the other side make all the canister filter connections tight. So, it ensures a leak-free set up to prevent water leakage.
The canister:
The canister, as you might guess, is the main container of the filter. It is mostly a rectangular or square-shaped box. All the filtration processes will hold inside the canister. Inside the canister, you will find the water pump, filtering media, and trays to hold the filtering media.
Filtering media tray:
The tray will accommodate the different filtering media on it. Different canister filter brands come with a different number of filtering media trays. You will mostly get two to three trays to accommodate various types of the filtration system.
Nonetheless, some expensive canister filters will come with even four to five trays. In the US, a standard canister filter will provide three to four trays inside the package.
Water intake and out gear:
Apart from the central hose, you will need several hoses and hard knots to transfer the water from the aquarium to the canister and vice-versa. Depending on the canister filter brand and space you have around the aquarium, these intakes and out throw accessories can be set up in two ways.
- You can mount the intake hose on the wall with the suction cup attached to it.
- Alternatively, you can attach the tube to the side of the canister wall.
Additional sponge:
A canister filter comes with foam for mechanical filtration. It is nothing except a simple sponge that works like a sponge filter. However, you should get the extra foam to optimize the mechanical filtration for the best results.
Choosing the right filtering media:
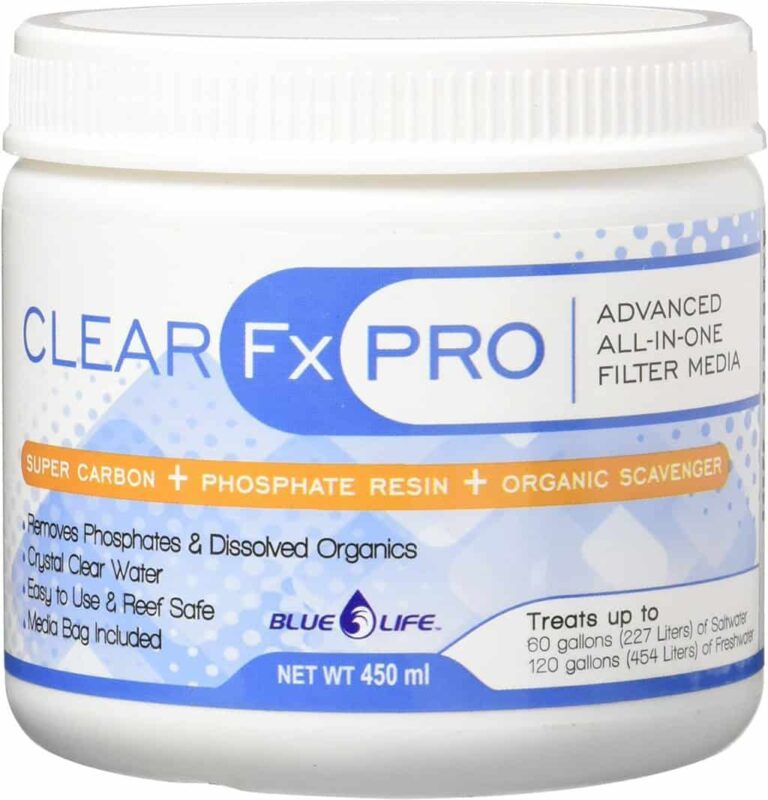
Ideally, a canister filter is capable of providing all three types of filtration for the aquarium water. Hence, you are at liberty to choose the filter media for these units. Nonetheless, the two most common and reliable media for canister filters are phosphate removers and bio balls.
The sponge or foam serves the mechanical and biological filtering to some extent.
- Phosphate remover: Most aquarium owners will use the activated carbon pad for the chemical filtering of the tank water. It removes the ammonia, nitrite, and nitrate from the tank water. But for the best result, you should use phosphate to reduce the ammonia build-up, plus it controls the algae growth inside the tank.
- Bio Balls: Bio balls serve the biological filtration for the aquarium. It degrades slowly and so is preferable for a cost-saving feature. Also, most canister filters will provide the bio balls with their ceramic rings inside the package.

How to Set up A Canister Filter: Step by Step Instructions
So, it’s time to start the actual set up of the canister filter. When you understand the various components of it, the mounting process should feel comfortable for you.
Unboxing the canister filter package:
Although it seems a little bit confusing, you will have to unbox and disassemble the canister filter first. Also, it is essential to check the components and accessories of the canister filter correctly. Remove all the accessories from the packaging box and check them one by one.
You must ensure that the package contains everything described on the product label. Also, every accessory must be in tip-top condition. It is essential because a broken or damaged component will result in the malfunctioning of the canister filter.
When you rest assured that all components are in good condition and nothing is missing, you can start the assembly.
Clean all the components:
Since all the accessories inside the package will be for some time, dust would accumulate on them. Also, these accessories become dirty during the transportation time. So, clean the components in the running water.
You can also use lukewarm water with the detergent for additional safety requirements. Once cleaned, rinse the gears with a clean cloth and allow them to air dry. You don’t have to use the hair dryer for it.
Setting up the tank and hoses:
Ideally, the canister filter should sit below the water level of the aquarium. It allows proper water flow from the tank to the canister and vice versa. Experts say that a canister filter should be 8 inches to 4.5 feet below the aquarium’s water level.
For this, please fill-up the tank to its maximum water level ad adjust the canister accordingly. You have to connect the water intake tube to carry the water from the tank to the canister. Once the inlet tube is attached correctly, cut the hose’s extra length for a proper connection. It also enhances the canister filter and aquarium aesthetics.
Fill in the canister filter media tray:
Lastly, you have to fill the filtering media tray with the right filters. For this, use a screwdriver to loosen the clamps connecting the pump and the canister. Once the clamp is loosened correctly, remove the clamp and detach the canister from the pump.
Inside the canister, you will find the filter tray. Fill these trays with the right filtering media.
Setting up the Canister Filter Media
You have to set up the mechanical, chemical, and biological filtering media one by one. Begin with the mechanical filters. These are mostly coarse sponges and come in a smaller size. Sponge coarseness is available in three states, low, medium, and fine rudeness.
You can keep the coarse sponge in the lowest part of the filter tray. You can either use the sponge provided within the package or add another sponge for the best optimization.
Add the biological filter to the next tray. Keep the bio balls in the tray. These bio balls should come with the canister filter package. Additionally, you might use bio home filtering media. It will enhance the biological filtration effectiveness.
Now, it turns to set up the chemical filter. Stuff the third tray with the activated carbon for the chemical filtration. Also, fill the tray with phosphate remover.
If the canister filter contains the fourth tray, fill it with a mixture of chemical and biological filtering for the best results.
Once you have filled the filtering trays, keep them inside the canister and clamp it with the pump.
Setting up the water inlet tube:
Now, read the user manual provided with the canister filter. It will help you know the actual process of setting up the inlet and out throw tube for the filter and fish tank.
Find the intake valve of the filter and connect one end of the hose with it. Connect the second end of the hose with the inlet tube. Take the secondary hose. Find the valve attached in the out throw tube and connect the secondary hose with it. Similarly, attach the second end of the hose with the canister filter valve. Use the suction cup to connect the inlet and out throw tube. Use the knots to fasten all the valves and connections.
Switch on the canister filter
This is the last step of setting up the canister filter. You should keep the canister filter valve open. It enables the canister to draw the water from the aquarium and then expel it inside the tank after the filtering is completed.
Read the guideline of the canister filter. If it requires water in the chamber, pour some water into the canister. Then switch on the filter. Also, some canister filters will need priming before it can start functioning properly.
The filters with the auto-priming capacity will allow water flow for some moments. Then, it will auto shutdown to expel the extra air pressure. Finally, it will start again and continue functioning until you turn off the canister filter.
Final Words
A canister filter, in all terms, is a heavy-duty filtering mechanism. So, you might find setting up the canister filter challenging. Therefore, we have broken down the guideline for how to set up a canister filter in the step by step instructions.
Thus, beginners should find the canister filter setup easy and comfortable. If you still find it difficult, feel free to contact and ask your questions.


